This project was assembled and created by Brian Murithii and Tina Wong.
Originally this project was supposed to be a generic coin sorter that can be found in almost every corner of Amazon. However, after much consideration for this project, we decided to move towards a more meaningful project and a more unique project. A project that could possibly change the routines of people and their everyday lives. A project that could also bring forth new possibilities and perspectives.
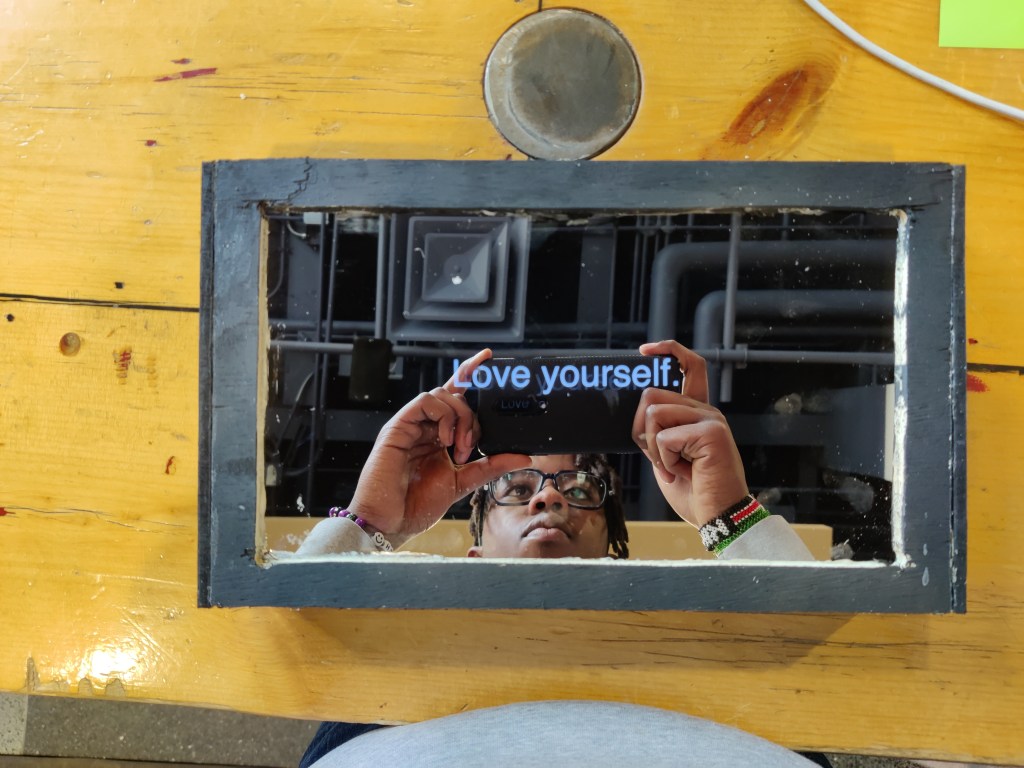
The project name is called Magic Mirror. The purpose of this mirror is so that when someone looks at a mirror and wants a pick-me-up or even words of affirmation, all they need to do is press a button. This is important because not everyone hears these words often enough in their lifetime. Thus, increasing the amount of affirmation in a person’s life can increase their productivity and create a positive outlook toward life. Positivity in life brings more value to a person than you would think. For this project, we also included a proximity sensor so that when the mirror detects someone is close by then it would tell the person to press the button. Once that button is pressed, then the person in the mirror will hear a beep, and then words will be shown in the mirror. Those words can include the following phrases; “Believe in yourself,”” Hard work pays off,” etc.
Words of affirmation help nurture a person’s emotional intimacy. People do not need to become intimate with a mirror but they can indeed become intimate with the person inside the mirror and understand their self-worth through affirmation. This can be most evidently seen in Snow White where the evil queen was super obsessed with themselves in the mirror. A person should understand their self-worth and not undermine it since it is necessary for our emotional state and self-motivation. It is also important to remind ourselves to love ourselves because it helps up become more confident and more motivated.
Our main goals for this project were to create something unique, and have two inputs and outputs minimum. The mirror portion of this project was the most unique part because you could see yourself in the mirror and have the words behind the mirror as well as the wiring all hidden behind. Meanwhile, we had to decide how to activate the mirror so that it could be easier to use for people. Thus, the best option was to tell the user what to do. The proximity senses a person at the mirror, and tells the user to press the button. Once the user presses the button, then a beep/sound would go off for a few seconds and then magic happens. Words of affirmation are then shown to the user. This cycle will continue to loop until the user goes away from the mirror and the proximity sensor doesn’t detect any movement. It’s pretty simple. Press the button, get some words of affirmation, and repeat.
Some say words have the most impact when you say them, but what they really mean is when you read the words, it changes everything. There’s a voice inside your head when you read words.
Enclosure
The enclosure is designed so that none of the wires would be showing. Thus we decided on a design that will fully utilize the mirror and the dark space. The only holes in the enclosure are the button, the potentiometer, and then a hole for the USB connection. It is also important that the inside of the enclosure is dark so that the mirror component can be used.


Arduino
In order to make the wiring on the breadboard work, I first must decide what each component should do. The potentiometer, button, and proximity sensor are inputs. The speaker and monitor(tablet) are outputs. When the potentiometer is turned, it turns the volume up and down. The button signals the speaker to make a sound and the sends the message to the microcontroller for an output. The output then tells the monitor to display.

Code: https://github.com/Enovai/Object/blob/b4448fc3094b4e4cd67e6f2167a260d9920794a4/Project_Code.ino
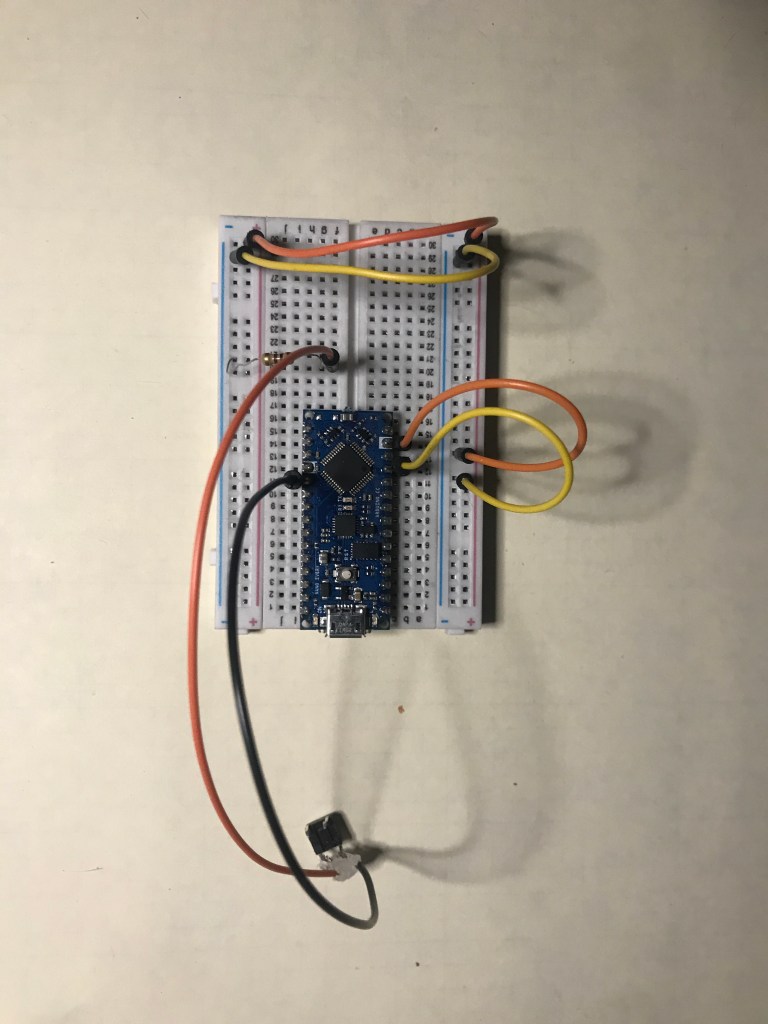
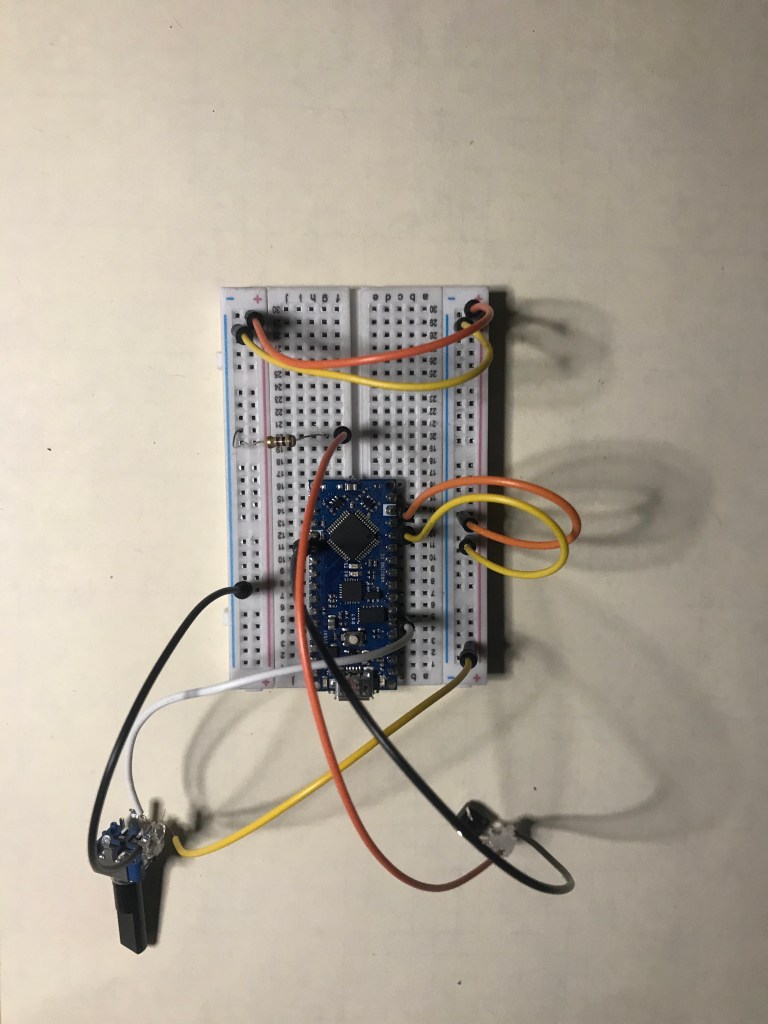
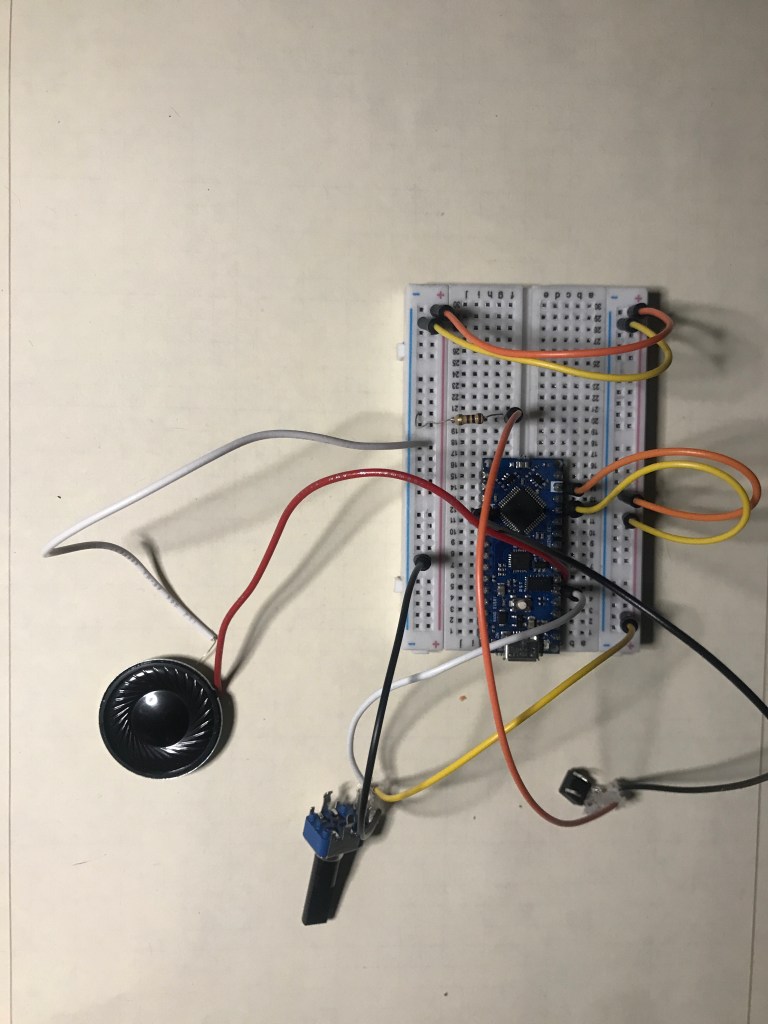
Breadboard
First, I had to connect ground and power throughout the entire board using the microcontroller. Then I connected a potentiometer to A1 and then connect that to ground and power. Next, I connected the button to the microcontroller pin 2 and then I added a resistor and connected the button to power and ground. The speaker is the next one that I connected, I connected it to ground and then power to A3. The last one that I connected to the microcontroller was the proximity sensor. The proximity sensor is connected to A2, and then connected to ground and power.


Schematic:
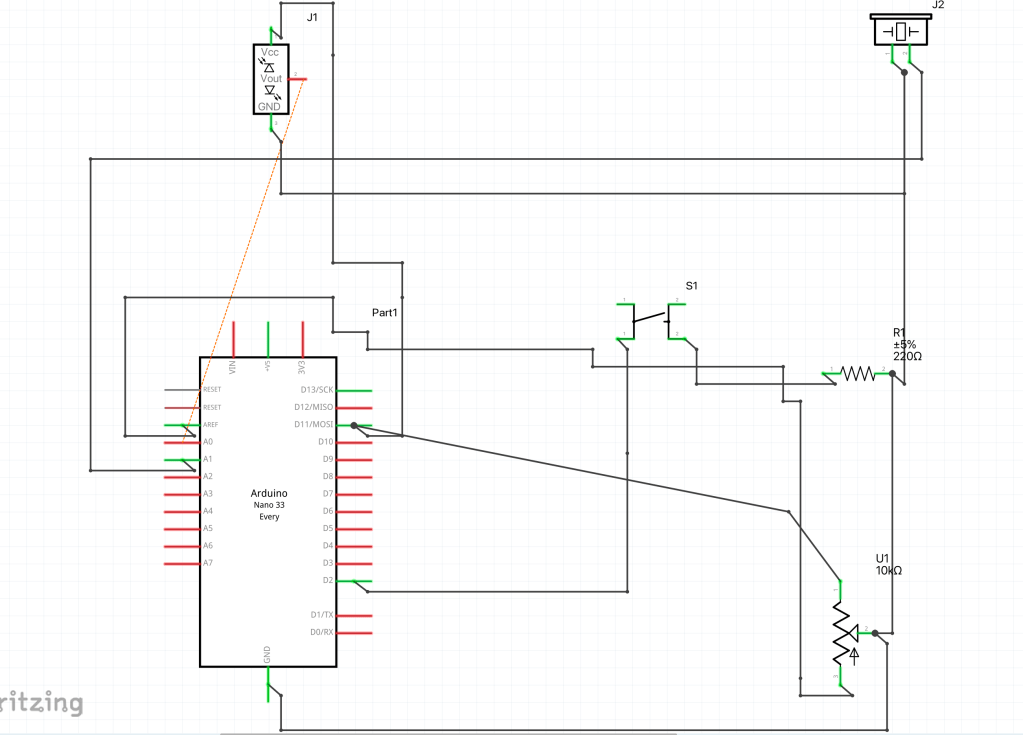
P5
P5 has been coded so that it displays the outputs. The outputs are the visual aspect of this project. It will include different phrases when the button is pressed and it will tell the person in the mirror to press the button when the proximity sensor senses someone is at the mirror.

Code Zip File: https://github.com/Enovai/Object/blob/17d6735f7381d742ed8757c76fdfae944027a5e2/Serial_+Arduino+_P5_2022_12_15_11_00_24.zip
Main Code: https://github.com/Enovai/Object/blob/7a857b3cbca940211ee7829c5772583851b81073/Main%20Code

Leave a comment